![DentalMarketing-Logo2-White copy.png]](https://grow.dentalmarketing.com/hs-fs/hubfs/DentalMarketing-Logo2-White%20copy.png?height=40&name=DentalMarketing-Logo2-White%20copy.png)
-
Email to invite: team@dentalmarketing.com
-
Role to assign:Admin (Full access)
Part 1: Create Your ChatGPT Ads Account
Step 1: Go to Ads Manager
Open your browser and go to https://ads.openai.com.
Step 2: Sign In or Create an Account
- If you already have an OpenAI account, click Sign In.
- If not, click Create Account and follow the prompts using a business email address (preferred over personal Gmail/Yahoo).
Step 3: Complete Account Information
You will be asked to enter the following details:
- Business / Advertiser name (exactly how you want it to appear in ads)
- Website URL
- Industry
- Country, currency, and time zone
- Favicon / logo (square image recommended)
Step 4: Set Up Billing
Go to Billing and add a payment method (credit card). Ensure you enter the billing address and an email address for invoices.
Step 5: Complete Account Verification
OpenAI will review and verify your account. This can take from a few hours up to a couple of days. You will see a green confirmation banner once verification is complete.
Part 2: Give DentalMarketing.com Admin AccessStep 6: Go to Users Settings
Once your account is verified, click Settings in the left menu, then click Users.
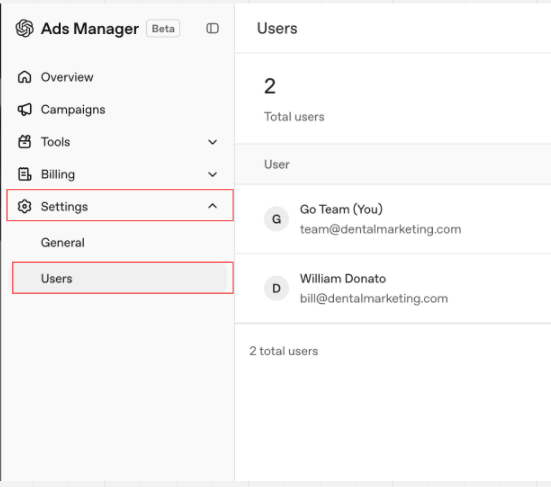
Description: Left sidebar with Settings → Users selected.
Step 7: Click Invite
In the top-right corner, click the + Invite button.
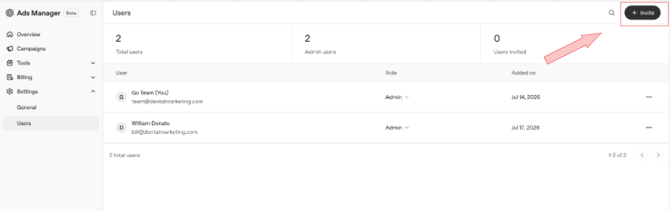
Description: Users page showing the “+ Invite” button.
Step 8: Enter Email and Select Admin Role
In the invitation popup, fill in the following:
- Email: team@dentalmarketing.com
- Role: Select Admin (Full access to the platform)
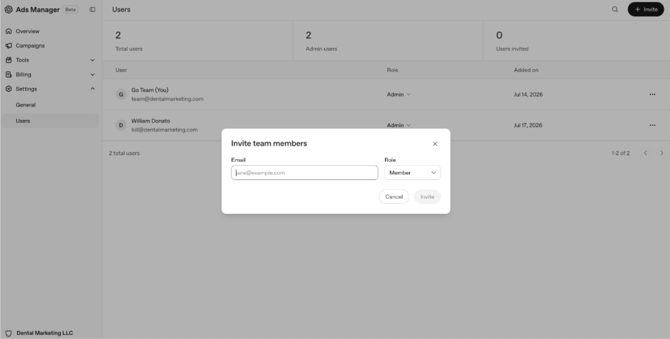
Description: “Invite team members” popup with the email filled in and the Role dropdown open (Admin selected).
Step 9: Send the Invitation
Click Invite or Send to complete the process.
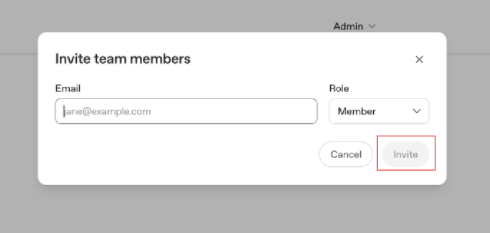
Description: Final invite confirmation or the popup just before sending.
What Happens Next
- DentalMarketing.com will receive the invitation email.
- Once we accept, team@dentalmarketing.com will appear in your Users list as an Admin.
- We will then handle campaign setup, tracking, creative, and ongoing optimization for you.
Important Notes
- Always assign the Admin role. Member or Viewer access is not enough.
- Use a business email when creating the account if possible.
- Keep the original account owner email active — do not delete it.