![DentalMarketing-Logo2-White copy-1.png]](https://grow.dentalmarketing.com/hs-fs/hubfs/DentalMarketing-Logo2-White%20copy-1.png?height=40&name=DentalMarketing-Logo2-White%20copy-1.png)
Step 1: Set Project Time Zone
- Go to the project's ticket in the "Creative Pipeline (Web)" and check the City & State of the practice's location:
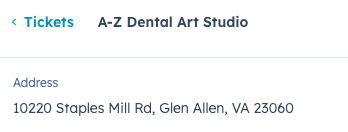
- Find out the practice's location time zone
- Take note of the UTC - GMT

- Go to the Webflow project, "General settings" > "Localization" and set the Time Zone.

- Click on "Save"
Step 2: Copy Scripts into Project
- Go to the Webflow project, "Custom Code" > "Head code", right below the custom style (</style>), paste this script:
<script>/* "OPEN NOW" Script */// Function to fetch the API and handle the responseasync function fetchAndHandleResponse() {// UPDATE COLLECTION ID HEREconst collectionID = '655b716eec6e71edef52198c';// UPDATE SITE ID HEREconst siteID = '655b716eec6e71edef521966';try {const response = await fetch(`https://us-central1-internal-projects-405217.cloudfunctions.net/open-now-v1?colID=${collectionID}&siteID=${siteID}`);const data = await response.json();console.log(data)const boolValue = String(data.isOpen).trim() === "true"console.log(boolValue)// Extract the boolean value from the responseconst isOpenNow = boolValue; // Assuming the API returns an object with an 'is_open' property// Select the element with the id 'open-now'const openNowElement = document.getElementById('open-now');// Change its display property based on the value of isOpenNowif (openNowElement) {openNowElement.style.display = isOpenNow ? 'block' : 'none';} else {console.error("Element with id 'open-now' not found.");}} catch (error) {console.error('Error fetching or parsing data:', error);}}// Call the function to fetch and handle the responsefetchAndHandleResponse();</script> - Click on "Save"
Step 3: Update Project ID
1. Navigate to the General tab under Site Settings, scroll down until you find the Overview Details and Locate the Site ID,

Proceed to Copy it the Site ID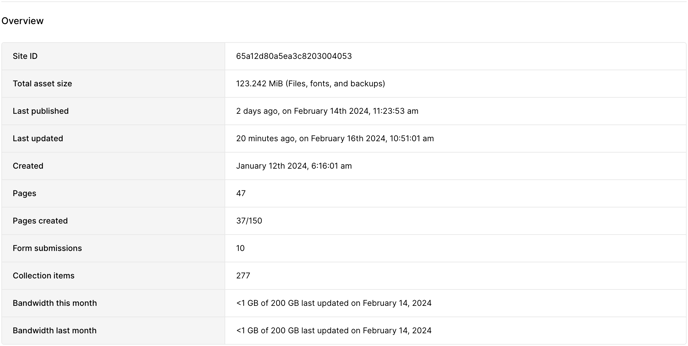
2. Navigate to the Custom Code tab and Paste the Site ID code on the Line:
const siteID = ' [code ID]' (marked below with a cyan line)
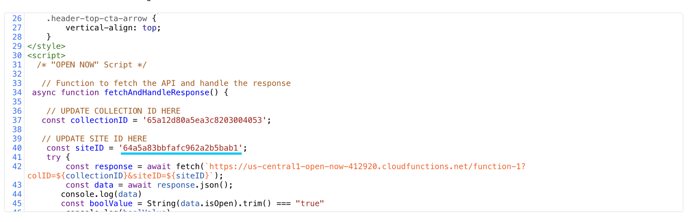
Step 4: Update Collection ID
1. Access the Designer Editor of the project.

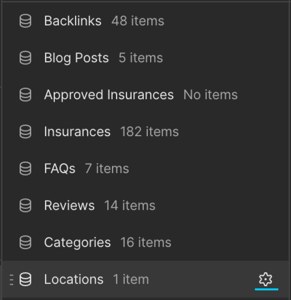
2. Navigate to the The CMS Tab on the left menu of the Designer, Hover under the Locations CMS Item and hover over it and you will see the settings icon appear, click on it to open the Location Settings (as pictured in Image 2)
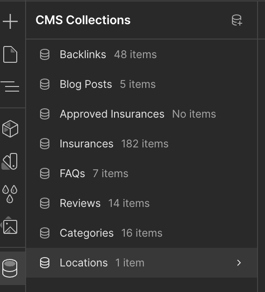
(Image 2- settings icon)
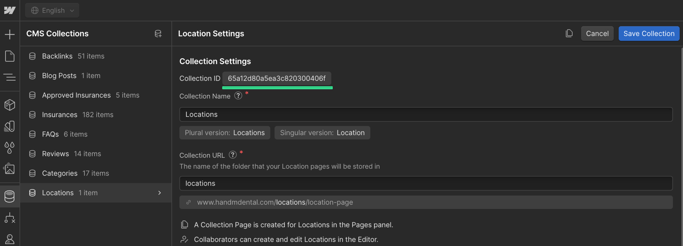
3. Click the Location Settings icon, and locate the Collection ID at the top of the settings menu Copy the Collection Item ID
(optional once in this settings move on to step 4 part 3 and after you are done with that step you can complete this process)
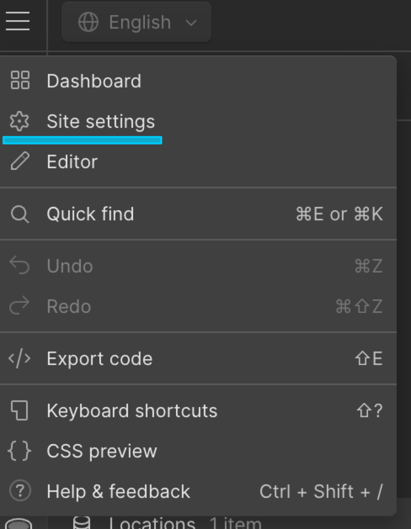
4. Go back to the Site Settings by clicking on the Hamburger Menu on the Webflow Designer.
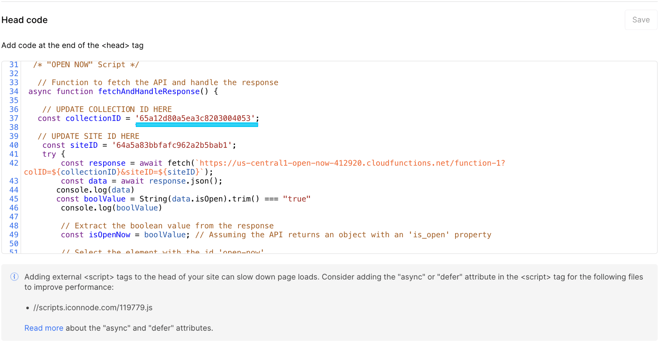
5.Once loaded navigate to the Custom Code tab

6. On the Custom code tab on the "Head code" Textbox and update with the Collection ID we copied from the CMS Location Settings
-const collectionID = '65a12d80a5ea3c820300406f';
Step 5: Update/Add Fields to "Locations" Collection
1. Access the Designer Editor of the project.
2. Navigate to the The CMS Tab on the left menu of the Designer, Hover under the Locations CMS Item and hover over it and you will see the settings icon appear, click on it to open the Location Settings (as pictured in Image 2)
(Image 2- settings icon)
3. once on the Location settings Click the button "+ Add a new Field"
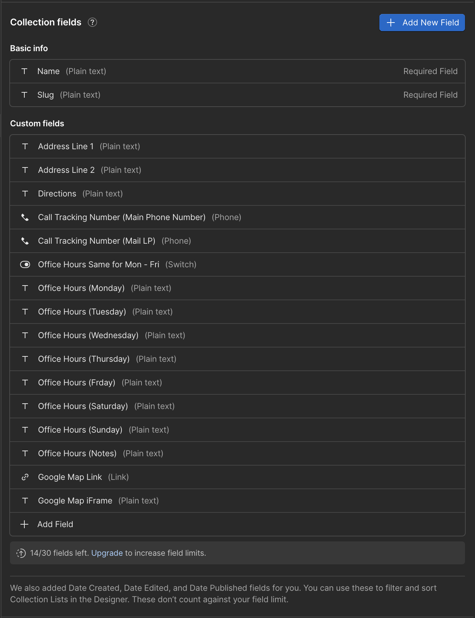
4. A new item will be created, Select the Plain Text option.
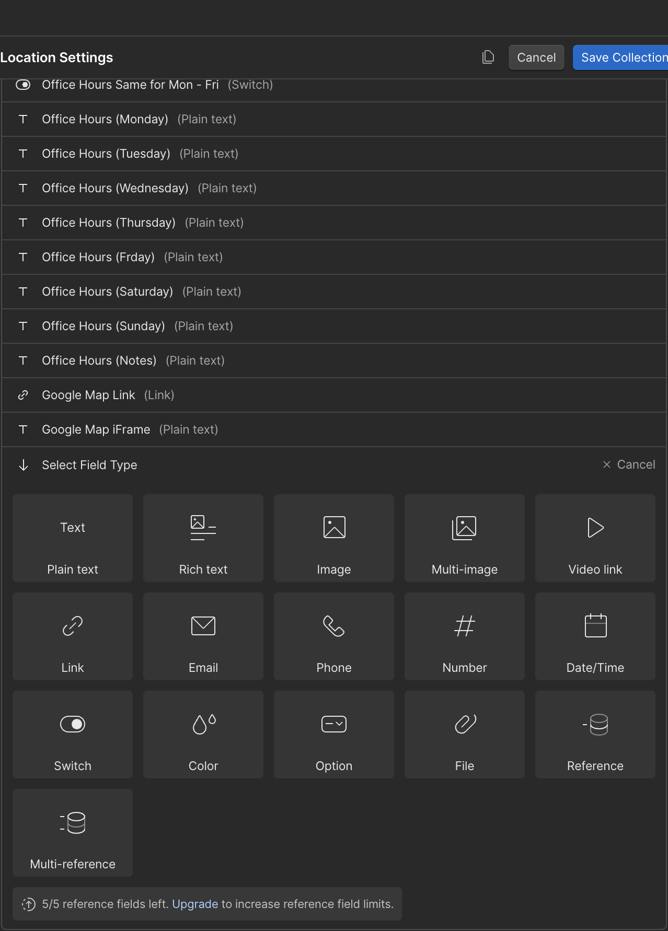
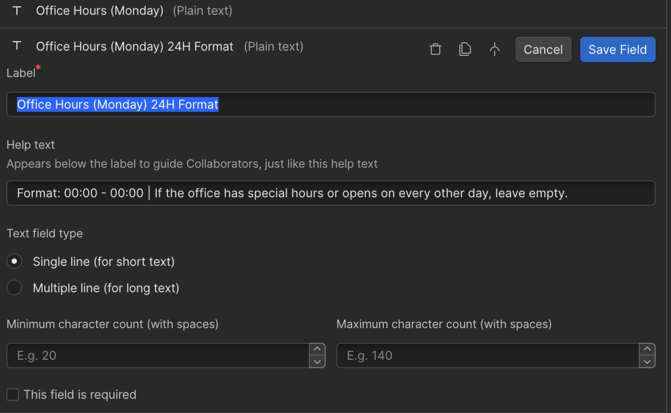
5. Fill the Label Text box with the following text and Create the following Fields, remember to save field when completing each one:
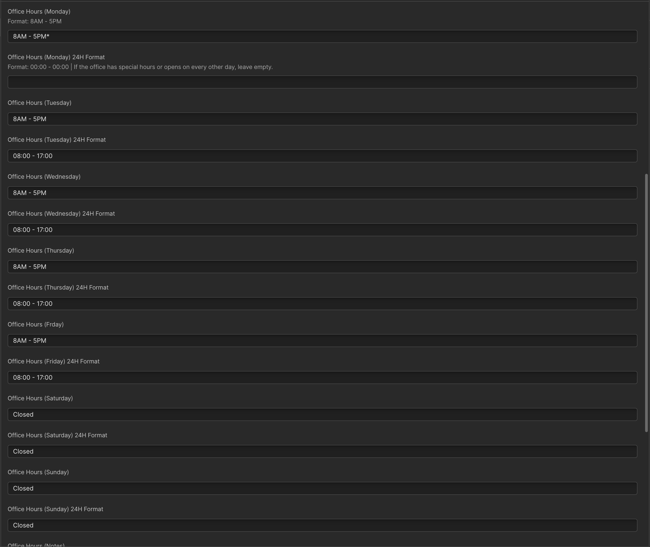
- Label text: Office Hours (Monday) 24H Format
Help text: Format: 00:00 - 00:00 | If the office has special hours or opens on every other day, leave empty. - Label text: Office Hours (Tuesday) 24H Format
- Label text: Office Hours (Wednesday) 24H Format
- Label text: Office Hours (Thursday) 24H Format
- Label text: Office Hours (Friday) 24H Format
- Label text: Office Hours (Saturday) 24H Format
- Label text: : Office Hours (Sunday) 24H Format
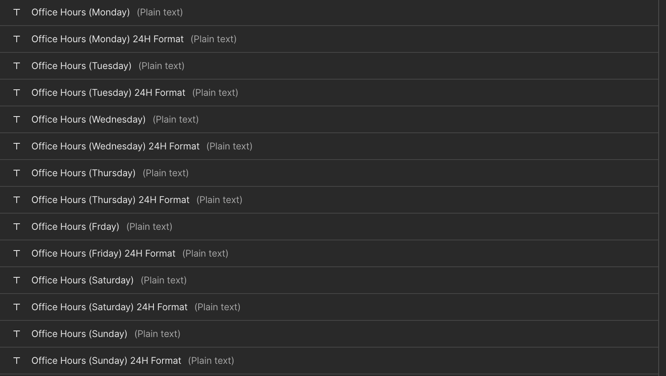
Once all are completed. Organized them so each day field for the week day are together Should Look like this.
6. Complete the fields using the following format (Remember it's a 24 hour format):
00:00 - 00:00
7. Click on Save
Step 6: Setup "Open Now!" Message in CTA Footer
1. Open "Footer CTA Link "on the Mobile Screen and Create a text block with the following settings:
Class: Footer CTA Note
Size: 0.75em
ID: open-now (VERY IMPORTANT)
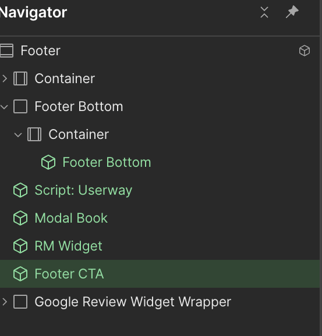
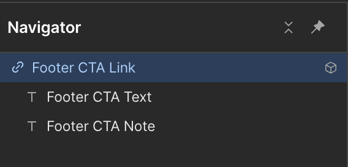

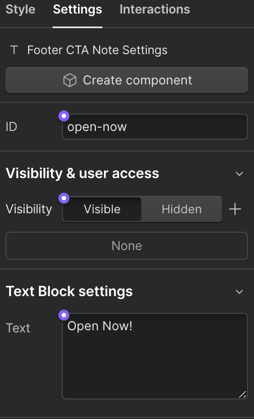
(Image Above on how to add clicking on Settings and fill the Text field for the ID)
Step 7: Publish
1. Once the Open Now message is Completed, Click on Publish on the Webflow Designer.
IMPORTANT: Do not Publish Homepages LP, or Homepage FS on Live Sites.
only publish on Live site is the Website has been Launched Completed.