![DentalMarketing-Logo2-White copy-1.png]](https://grow.dentalmarketing.com/hs-fs/hubfs/DentalMarketing-Logo2-White%20copy-1.png?height=40&name=DentalMarketing-Logo2-White%20copy-1.png)
Note: We typically complete Advertiser Verification on behalf of our clients, but if a client prefers, they can complete Advertiser Verification themselves. We may be unable to complete Advertiser Verification on behalf of our Canadian clients due to issues with the form not allowing us to change the associated county when confirming the address associated with our individual identity, which is the last step of the verification form.
Part 1 - Notification of Advertiser Verification
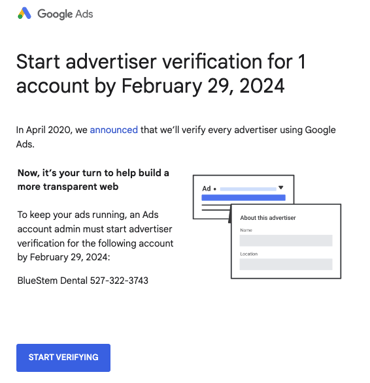
- When Google requires Advertiser Verification for a client, we will receive an email notification from Google that looks similar to the example shown below.
-
As soon as the notification is received:
- Check the Google Ads account under Billing > Advertiser Verification to confirm whether the requirement is standard Advertiser Verification or Business Operations Verification.
-
Add the item to the TD/SA Priority List.
-
Include the client name, the required action (i.e. “Need to complete Advertiser Verification on Google by X/X”), and the assigned SA.
-
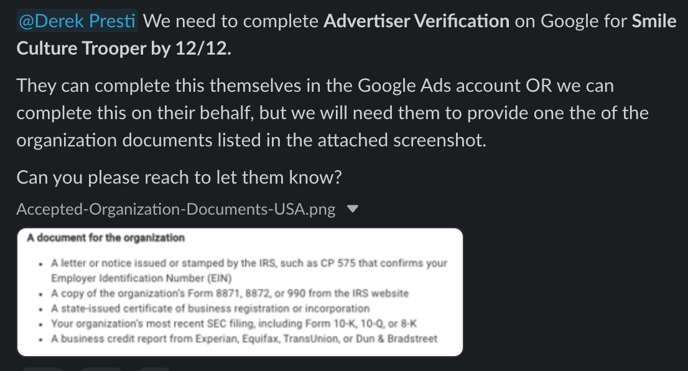
Notify the assigned SA in the #dm-trade-desk-and-ms Slack channel.
-
Clearly specify which verification type is required (i.e. standard Advertiser Verification or Business Operations Verification).
- Use the pinned message templates in the channel for the correct verification type.
-
-
The SA will notify the client that verification is required by the specified deadline.
-
The SA will provide the client with the list of accepted documents.
-
Note: The client may complete the verification themselves if they have admin access in Google Ads.
-
Part 2 - Submitting Verification Document to Google
If Business Operations Verification is required, follow the Business Operations Verification SOP instead. Otherwise, for standard Advertiser Verification, follow the updated steps below.
- Begin Verification
- Once the SA receives a valid document from the client, they will send it in the #dm-trade-desk-and-ms message thread.
- Open the client’s Google Ads account.
- Go to Billing → Advertiser Verification.
- Complete each verification section as listed below.
-
Questions About Your Organization
-
Click Start task.
-
Select the following options as prompted (some questions may not be asked):
-
Is your organization an advertising agency?
-
Yes
-
-
Who do you want to verify today?
- A client
- Does your agency pay for this client's account?
- No, our client pays for this account
- Where is your client located?
- Select the proper country
- Does your client advertise their own products/services, or someone else's?
- They advertise their own products/services
- What's your clients industry (or industries)?
- Business & Industrial
-
-
-
-
-
- Save & Continue.
- Provide Your Dun & Bradstreet Info (if applicable)
- Click Start task.
- Click Start verification.
- Enter the organization name exactly as shown on the client’s document.
- Enter the organization’s address exactly as listed on the document.
- Submit.
- If an error message appears saying that verification could not be completed, select Submit documents instead and then proceed to the next step below.
- Submit Your Documents
- Click Start task.
- Enter the organization name exactly as shown on the client’s document.
- Upload the document provided by the SA.
- Enter the organization’s address exactly as listed on the document.
-
Provide your verifier information:
-
Enter your full name.
-
Upload your ID (driver’s license or passport recommended).
-
Enter the address associated with your ID.
-
If the county cannot be changed and this blocks submission, notify the SA.
-
If your ID was issued outside the US, change the issuing country accordingly and use the DentalMarketing.com address (1900 Glades Rd, 4th Floor, Boca Raton, FL 33431).
-
-
- Submit.
-
-
- Who Pays for Your Ads?
- Click Start task.
- Select “CLIENT NAME pays for CLIENT NAME’s ads.”
- Submit answer.
- Who Pays for Your Ads?
-
- EU Political Ads
- Click Start task
- Select “No, I don’t plan to use this account to run EU political ads.”
- Submit answer.
- EU Political Ads
Part 3 - Post-Submission Steps
- After submitting the valid document, review the Advertiser Verification screen.
- If it shows “Under review”:

- Update the TD/SA Priority List: add “Under review” in the Notes column.
- Notify the SA in the same Slack message thread that the document has been submitted and that we will follow up once approved.
- If it shows that verification was successful or once Google sends the approval email:
- Move the TD/SA Priority List item to Resolved Items (if not already done).
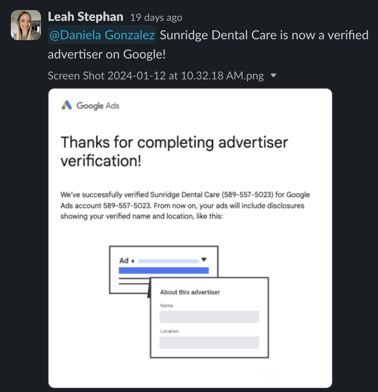
- Notify the SA in Slack with the screenshot and confirm the client is now verified.