![DentalMarketing-Logo2-White copy-1.png]](https://grow.dentalmarketing.com/hs-fs/hubfs/DentalMarketing-Logo2-White%20copy-1.png?height=40&name=DentalMarketing-Logo2-White%20copy-1.png)
Note: Google’s minimum budget is typically around $300-$400/wk for Local Service Ads, but it depends on the specific market and this budget is in addition to the current Google Ad’s budget
Note: On average, it can take between 2-4 weeks after submitting the necessary information to Google to complete verification and be approved to go live
Part 1: Requesting Information
- Request the following information from the client in order to seamlessly go through Part 2 once the necessary information has been provided
-
Owner’s First Name
-
Owner’s Last Name
-
Number of Employees
-
Year Founded
-
Languages Spoken
-
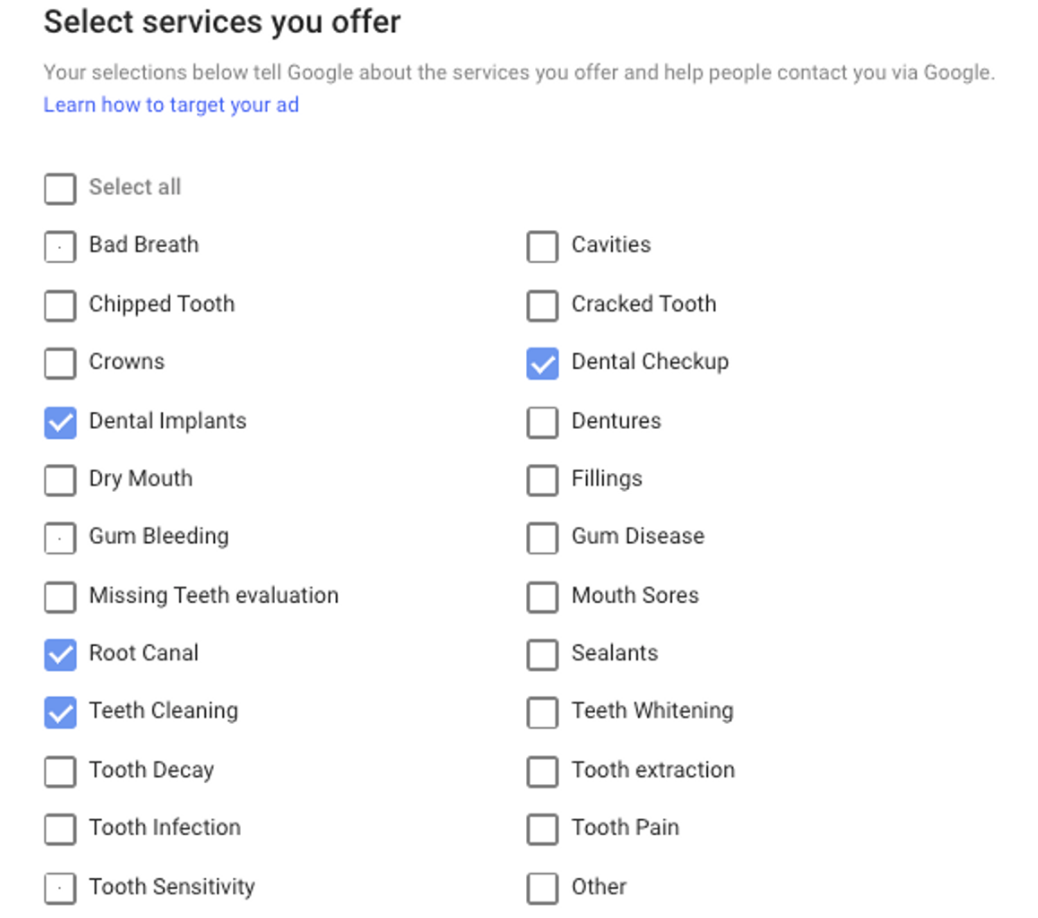
Services Offered
-
National Provider Identifier (Number)
-
Proof of Insurance (General Liability Insurance PDF)
- Note: The liability document needs to be submitted to Google at least 14+ days before the policy expiration date(s)
-
-
-
List of dentists to be featured within LSAs with email, job types, license number, license expiration date (needs to be at least 2 weeks from today), Professional Liability Insurance PDF, and headshot for each
- Note: The Professional Liability document needs to include the specific doctors' names as covered providers and need to be submitted to Google at least 14+ days before the policy expiration date(s)
- Also, please confirm if they are a ‘Business Owner/Senior Partner’
-
Part 2: Setting Up Account
- Go to the Local Service Ads MCC Report
- Sign in under team@dentalmarketing.com > Select ‘Dental Marketing’
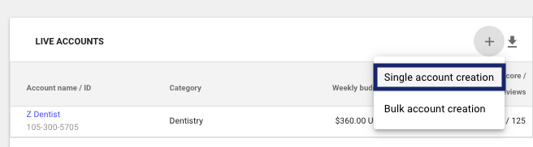
- Click the grey ‘+’ to add new account > Select ‘Single account creation’ > Select ‘ For existing Google Ads Account’
- Enter requested account information (i.e. business name, phone, website, Google Ads account number, zip code, business categories)
- Select ‘dentistry’ as the Business Category
- Note: For the phone number, be sure to use the Google Ads call tracking number if it's present on the site (via dynamic insertion script), otherwise use the website call tracking number
- To view the Google Ads call tracking number, you need to force the website to "swap" the phone number and you can do this by visiting the URL and adding this parameter at the end:
?network=g
-
You can also verify this number in the Admin dashboard portal under the practice name > 'Twilio' > 'Google Ads - (XXXX)'
-
- To view the Google Ads call tracking number, you need to force the website to "swap" the phone number and you can do this by visiting the URL and adding this parameter at the end:
- Enter requested account information (i.e. business name, phone, website, Google Ads account number, zip code, business categories)
-
- Click ‘Create Account’
- Enter service areas and excluded areas (if applicable), services, and office hours
- Note: For targeted service areas, try to target the same areas that we are targeting in Google Ads
- Enter the business hours exactly as listed on the site
- Submit ‘Proof of Insurance’ (i.e. General Liability insurance document)
- Submit information for the ‘Background Check’
- Log into Evident using team@dentalmarketing.com, then input the requested information:
- Submit information for each 'Featured Dentist'
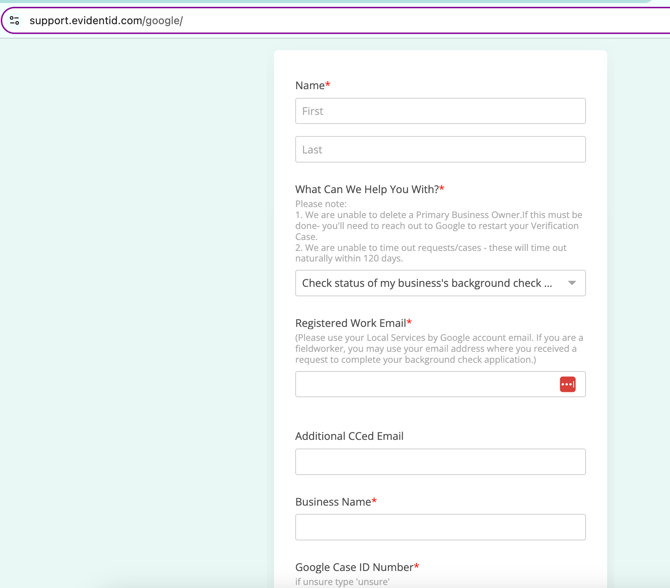
- Submit information for each 'Featured Dentist'
- Log into Evident using team@dentalmarketing.com, then input the requested information:
- Link the Google Business Profile
- Set the ‘Budget’
- Note: During the setup process, Google will provide budget recommendations for the practice based on their market, so you should confirm with the SA if the client is okay with starting with the minimum budget that Google provides (cannot go lower than the minimum budget)
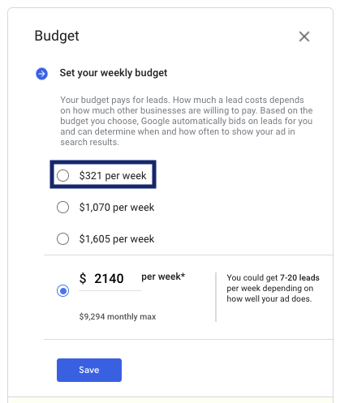
- Note: During the setup process, Google will provide budget recommendations for the practice based on their market, so you should confirm with the SA if the client is okay with starting with the minimum budget that Google provides (cannot go lower than the minimum budget)
- Submit ‘Featured Dentist’ information (i.e. dentist name, email, job types, license number, and headshot) and corresponding Professional Liability document (including the specific doctor's names as covered providers)
- Note: Once this information is submitted, the dentists will receive a verification email at the email address listed that they need to complete and confirm their license number
- Provide ‘National Provider Identifier’ (number)
- Note: Google will try to find the NPI number for the practice, but if they are unable to find it then you may need to call them to provide it to them directly
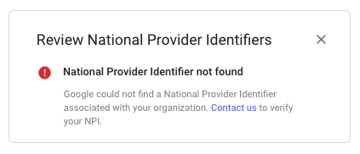
- Note: Google will try to find the NPI number for the practice, but if they are unable to find it then you may need to call them to provide it to them directly
- Once all information is submitted to Google, Google will verify all information and show progress on the verification URL
- After all verification is complete, Local Service Ads will go LIVE immediately
- You can view all live accounts for Local Service Ads here: https://ads.google.com/u/3/localservices/mccreports?mcid=7104826747&euid=1453000593&hl=en&gl=US&cid=8536140165&bid=2710288134&pid=9999999999
- Once ads are LIVE, confirm to to the CSM that they are LIVE for Local Service Ads, provide the Leads Inbox URL for the account, and have the CSM remind the client that they will need to “frequently monitor the Leads Inbox and mark leads as ‘booked’ if they book an appointment or ‘archive’ if they are unqualified/do not book an appointment“
- Note: The client email that has access to the Google Ads account will be able to view/manage the Leads Inbox as well - if there isn’t a client email that already has access to the Google Ads account, then we will need to add one
- After all verification is complete, Local Service Ads will go LIVE immediately
Part 3: Documenting Budget
- Once LSAs are LIVE, make sure the separate LSA budget and Google Ads budgets are documented correctly on the company dashboard in Hubspot
- In Optmyzr, adjust the "monthly budget" to be the combination of the LSA budget and the Google Ads budget
- For the Flexible Budget/Hit Budget Spent script, use the combination of the LSA budget and the Google Ads budget > Save changes
- For the Reach Target Monthly Spend/Budget pacing script, use the Google Ads budget only > Save changes
- In Optmyzr, add an "LSA" label to the account to make it easy for others to determine that the account is running Local Service Ads